In the previous post I wrote about building home NAS/HTPC with ZFS on Linux. Here I’d like to talk a bit about ZFS as a RAID manager and filesystem.
Part 1: Planning and Hardware
Part 2: ZFS and Software
Part 3: Performance Benchmarks
Part 4: Compression and Deduplication
Part 5: Deduplication in Practice
ZFS Zpool
ZFS was originally developed for Solaris, by then Sun Microsystems. It has since been ported to Linux in two flavors: FUSE and native kernel module. Unlike the latter, the former run in userland and, owing to being in user-space, has a rather flexible configuration (in terms of setting it up and running it) than kernel modules. I have had an interesting run with custom kernel modules when I upgraded Ubuntu, which broke my zpool, that I’ll get to in a bit. I haven’t tried running ZFS with FUSE, but I’d expect it to have lower complexity. For the best performance and highest integration, I went with native kernel support.
Of the biggest issues with kernel modules is the question of stability. One certainly doesn’t want an unstable kernel module. Doubly so if it manages our valuable data. However the ZFS on Linux project is very stable and mature. In the earlier days there were no ZFS boot loaders, so the boot drive couldn’t run ZFS. Grub2 already supports ZFS (provided ZFS module is installed correctly and loaded before it,) but I had no need for it. FUSE would do away with all of these dependencies, but I suspected it also means ZFS on boot drive wouldn’t be trivial either, if at all possible.
As explained in the previous post, I used a two flash drives in RAID-1 with ext4 for the boot drive. However, soon after having ran the system for a couple of weeks, and filled it with most of my data, I “moved” /usr, /home and /var to the zpool. This reduces the load on the flash drives and potentially increases the performance. I say “potentially” because a good flash drive could be faster than spinning disks (at least for I/O throughput and for small files) and the fact that it doesn’t share the same disk (especially spindle disks) makes for higher parallel I/O throughput. But I was more concerned about the lifetime of the flash drives and the integrity of the data than anything. Notice that /var is heavily written to, mostly in the form of logs, while /usr and /home are very static (unless one does exceptionally high I/O in their home folder,) and it’s mostly reads. I left /bin and /lib on the flash drive along with /boot.
Installation
Once the hardware is assembled and we can run it (albeit only to see the BIOS,) we can proceed to creating the boot drive and installing the OS and ZFS. Here is a breakdown of what I did:
- Download Ubuntu Minimal: https://help.ubuntu.com/community/Installation/MinimalCD
- Create bootable USB flash drive using UnetBootin: http://unetbootin.sourceforge.net/
- Insert the USB flash drives (both bootable and target boot) and start the PC, from the bios make sure it boots from the bootable flash drive.
- From the Ubuntu setup choose the Expert Command-Line option and follow the steps until partitioning the drive.
- Partition the flash drives:
- Create two primary Raid partitions on each drive, identical in size on both flash drives. One will be used for Swap and the other RootFS. The latter must be marked as bootable.
- Create software Raid-0 for one pair of the partitions and set it for Swap.
- Create software Raid-1 for the other pair of the partitions and format it with ext4 (or your prefered FS,) set the mount to be / and options ‘noatime’.
- Full instructions for these steps (not identical though) here: http://www.youtube.com/watch?v=z84oBqOxsD0
- Allow degraded boot and resliver with a script. Otherwise, booting fails with a black screen that is very unhelpful.
- Complete the installation by doing “Install base system,” “config packages,” “select and install software,” and finally “Finish installation.”
- Remove the bootable USB flash drive and reboot the machine into the Raid bootable USB we just created.
- Optional: Update the kernel by downloading the deb files into a temp folder and executing sudo dpkg -i *.deb. See http://www.upubuntu.com/2013/09/installupgrade-to-linux-kernel-311.html for ready script and commands.
- Install ZFS:
- # apt-add-repository –yes ppa:zfs-native/stable
- # apt-get update
- # apt-get install ubuntu-zfs
- Optional: Move /tmp to tmpfs (ram disk):
- # nano /etc/fstab
- Append the following: tmpfs /tmp tmpfs defaults,noexec,nosuid 0 0
- Format the drives (repeat for all):
- # parted –align=opt /dev/sda
- (parted) mklabel gpt
- (parted) mkpart primary 2048s 100%
- Find the device names/labels by ID: # ls -al /dev/disk/by-id
- Create the zpool with 4096b sectors:
# zpool create -o ashift=12 tank raidz2 scsi-SATA_WDC_WD30EFRX-68_WD-WMC1T0000001 scsi-SATA_WDC_WD30EFRX-68_WD-WMC1T0000002 scsi-SATA_WDC_WD30EFRX-68_WD-WMC1T0000003 scsi-SATA_WDC_WD30EFRX-68_WD-WMC1T0000004 scsi-SATA_WDC_WD30EFRX-68_WD-WMC1T0000005 scsi-SATA_WDC_WD30EFRX-68_WD-WMC1T0000006
An optional mountpoint may be specified using -m switch. Example: -m /mnt/data. The default mountpoint is the pool name in the root. In my case /tank. - Optional: Enable deduplication (see notes below): # set dedup=on tank
- Optional: Enable compression by default: # set compression=gzip-7 tank
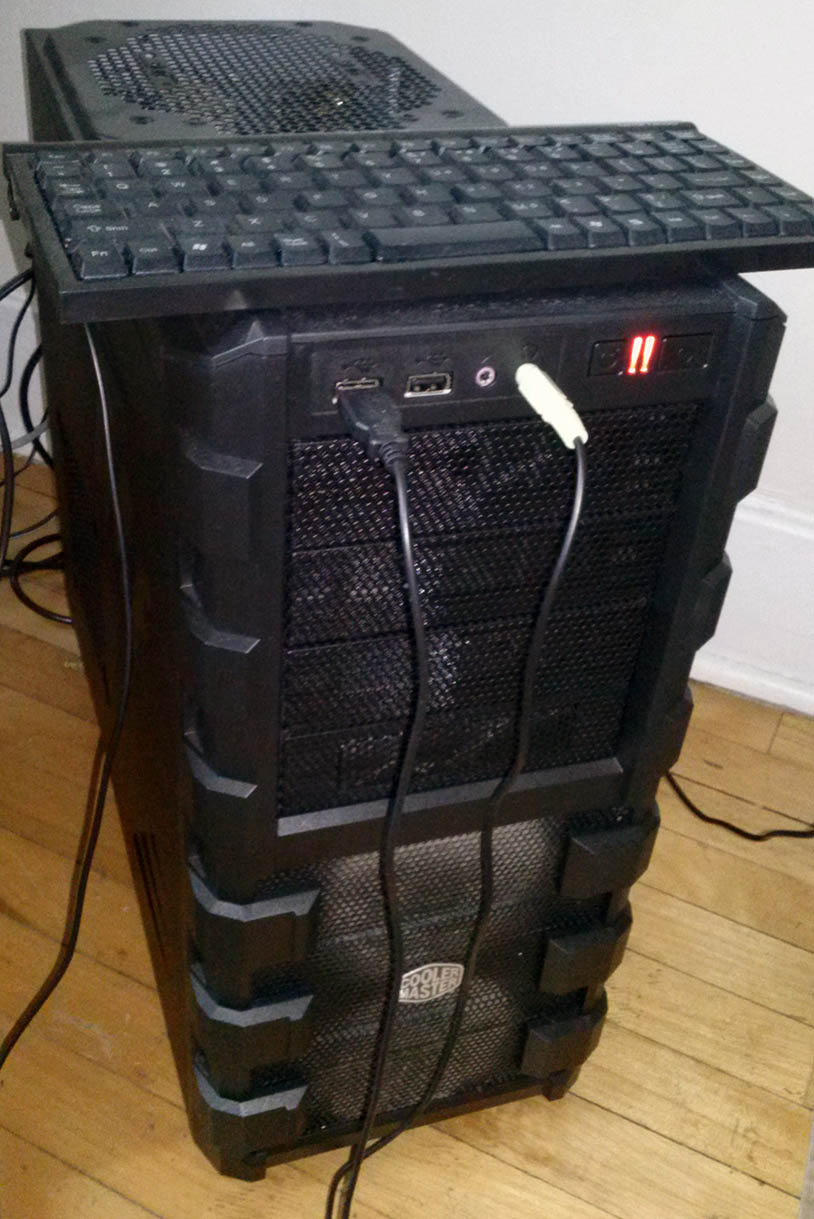
Outside the box with the compact format keyboard and the 2x 120mm fans blowing on the drives visible.
Notes
A few notes on my particular choices:
First, I chose to have a swap drive mostly to avoid problems down the road. I didn’t know what software might one day need some extra virtual memory and didn’t want the system to be limited by RAM. Speaking of RAM, I was rather short on it and would absolutely have loved to have a good 16GB. Sadly, prices have been soaring for the past couple of years and they haven’t stopped yet. I had to do with 8GB. Also, my motherboard is limited to 16GB (a choice based on my budget). So when push comes to shove, I can’t go beyond 16GB. I also had sufficient boot disk space, so wasn’t worried that I’d ran out. Of course the swap drive is raid-0 as performance is always critical when already swapping and there are no data integrity concerns (a corruption will probably take down the process in question, but that’d threat the boot drive as well). Raid-1 is used for the boot partition, which is a mirror, meaning I had two copies of my boot data.
Second, alignment is extremely important for both flash drives and large-format drives (a.k.a. 4096-byte sectors). Flash drives comes from factory formatted with the correct alignment. There is no need to repartition or reformat the drives, unless we need to change the filesystem or have special needs. However if we must, the trick is to create the partition at an offset of 2048 sectors (or a megabyte). This ensures that even if the internal logical block (which is the smallest unit used by the flash firmware to write data) is as large as 1024KB, it will still be correctly aligned. Notice that logical units of 512KB are not uncommon.
Device Boot Start End Blocks Id System
/dev/sdg1 2048 11327487 5662720 fd Linux raid autodetect
/dev/sdg2 * 11327488 30867455 9769984 fd Linux raid autodetect
ZFS will do the right thing if we create the pool on the root of the drive and not partitions; it will create a correctly aligned partition. I manually created partitions beforehand mostly because I wanted to see whether or not the drives were native large-format or it was emulating. However we absolutely must mark the block size to be 4096 when creating the pool, otherwise ZFS might not detect the correct sector size. Indeed, for my WD RED drives, the native sector size is advertised as 512! Marking the block size is done by ‘ashift’ and it’s given in powers of two; for 4096 ‘ashift’ is set to 12.
Third, it is crucial to create the pool using disk IDs and not their dynamically assigned names (eg. sda, hdb, etc.). The IDs will not change as they are static, but the assigned names almost certainly will and that will cause headache. I had to deal with this problem (more later) even though, and as you can see in the command above, I had used the disk IDs when creating my zpool. Notice that using the disk ID will also save you from the common mistake of create the zpool using the partitions of the disk, rather than the root of disk (the IDs are unique to the disks but the partition and disk have each its own assigned name).
Trouble in paradise
I’ll fast forward to discuss a particular problem I faced that is a valuable lesson. After upgrading from Ubuntu raring (13.04) to saucy (13.10) the pool showed up as UNAVAILABLE. After the initial shock had passed I started trying to understand what had happened. Without having an idea of what the issue is, it’s near impossible to solve it. UNAVAILABLE, as scary it looks at you, doesn’t say much as to why the system couldn’t find it.
# zpool status
pool: tank
state: UNAVAIL
status: One or more devices could not be used because the label is missing or invalid.  There are insufficient replicas for the pool to continue functioning.
action: Destroy and re-create the pool from a backup source.
see: http://www.sun.com/msg/ZFS-8000-5E
scan: none requested
config:NAME        STATE     READ WRITE CKSUM
zfs         UNAVAIL      0     0     0  insufficient replicas
raidz2-0  UNAVAIL      0     0     0  insufficient replicas
First thing I did was a reality check; sure enough my home was on the boot (flash) drive. Good thing it wasn’t very outdated since I had moved /usr, /home and /var to the zpool. I was glad the machine booted and I had essentially everything I needed to troubleshoot. The link in the zpool output above turned out to be less than useful.
The real hint in the status message above is the “label is missing” part. After reading on the status and googling parts of the messages above, I wasn’t any closer to understanding the problem. I went back to my shell and listed the devices. I could see the 6 drives. Clearly they are detected. So it’s not a bad motherboard or controller issue, and possibly not a dead drive either. After all, it’s a zpool-2 (equivalent to raid-6) so unless three drives failed at once, or half my stock, “there will be sufficient replicas for the pool to continue functioning.”
Clearly what happened was related to the upgrade. That was my biggest hint as to what triggered it. This wasn’t helpful in googling, but I had to keep it in mind. At this point I was already disappointed that the upgrade wasn’t seamless. I listed the devices and started looking for clues. I had created the pool using the device IDs, which are unique and never change from system to system. So my expectation was that it wasn’t a drive mapping issue. Alas, it was precisely a problem of drive mapping.
The reason turned out to be that the “scsi” IDs that I’ve used to create the pool were now no longer listed under /dev/disk/by-id/. Instead, there were only the “ata” IDs. At the time of creating the pool I had both “scsi” and “ata” IDs. I chose the former for one reason or another. Turns out that the “scsi” names were removed from the /dev/disk/by-id/ listing.
The solution turned out to be rather simple, finding it was anything but. By exporting and importing the pool the new IDs were detected and the pool reconstructed.
# zpool export tank
# zpool import
After exporting, zpool status would complain that there were no pools. During importing, zfs detected the drives and mapped them correctly.
Mounting Trouble
At this point I was happy again, but for a short while. Turns out I wasn’t done yet. The three root directories I had moved to the zpool were not mounting anymore. I could forcefully mount them (with great difficulty as every time it’d complain it couldn’t mount,) only to find the directories were the original ones on the boot drive and not the zpool versions. The way it was supposed to work was by mounting the zpool directory to the same mountpoint as the boot drive ones, they masked the latter.
After a rather long chase, and many reboots to see if my changes stuck or not, I found out that the process responsible for mounting is mountall. However ZFS has its own custom build, which apparently got reverted with the upgrade.
This page has all the details about mountall and ZFS and troubleshooting. First thing I did was:
# apt-cache policy mountall
mountall:
Installed: 2.48build1-zfs2
Candidate: 2.51-zfs1
Version table:
2.52 0
500 http://ca.archive.ubuntu.com/ubuntu/ saucy/main amd64 Packages
2.51-zfs1 0
1001 http://ppa.launchpad.net/zfs-native/stable/ubuntu/ saucy/main amd64 Packages
*** 2.48build1-zfs2 0
100 /var/lib/dpkg/status
Clearly I’m using an old mountall version. How about zfs?
# apt-cache policy ubuntu-zfs
ubuntu-zfs:
Installed: 7~raring
Candidate: 7~saucy
Version table:
7~saucy 0
1001 http://ppa.launchpad.net/zfs-native/stable/ubuntu/ saucy/main amd64 Packages
*** 7~raring 0
100 /var/lib/dpkg/status
Good: there is a saucy version. Bad: Ubuntu upgrade didn’t get it automatically. I suspect this has to do with the fact that I had used the raring package URL. Still, one expects a bit better upgrade support when it comes to kernel modules that can lock one out of the machine.
Upgrading ZFS to Saucy
First, I appended the saucy PPAs to /etc/apt/sources.list:
# ZFS
deb http://ppa.launchpad.net/zfs-native/stable/ubuntu saucy main
deb-src http://ppa.launchpad.net/zfs-native/stable/ubuntu saucy main
And reinstalled ZFS to force removing the current version for the newer one.
# apt-get install --reinstall ubuntu-zfs
Reading package lists... Done
Building dependency tree
Reading state information... Done
The following packages were automatically installed and are no longer required:
avahi-daemon avahi-utils libavahi-core7 libdaemon0 libnss-mdns
Use 'apt-get autoremove' to remove them.
Suggested packages:
zfs-auto-snapshot
The following packages will be upgraded:
ubuntu-zfs
1 upgraded, 0 newly installed, 0 to remove and 348 not upgraded.
Need to get 1,728 B of archives.
After this operation, 0 B of additional disk space will be used.
Get:1 http://ppa.launchpad.net/zfs-native/stable/ubuntu/ saucy/main ubuntu-zfs amd64 7~saucy [1,728 B]
Fetched 1,728 B in 0s (6,522 B/s)
(Reading database ... 89609 files and directories currently installed.)
Preparing to replace ubuntu-zfs 7~raring (using .../ubuntu-zfs_7~saucy_amd64.deb) ...
Unpacking replacement ubuntu-zfs ...
Setting up ubuntu-zfs (7~saucy) ...
Now, to check if all is as expected:
# apt-cache policy ubuntu-zfs
ubuntu-zfs:
Installed: 7~saucy
Candidate: 7~saucy
Version table:
*** 7~saucy 0
1001 http://ppa.launchpad.net/zfs-native/stable/ubuntu/ saucy/main amd64 Packages
100 /var/lib/dpkg/status

# grep parse_zfs_list /sbin/mountall
Binary file /sbin/mountall matches

# apt-cache policy mountall
mountall:
Installed: 2.52
Candidate: 2.51-zfs1
Version table:
*** 2.52 0
500 http://ca.archive.ubuntu.com/ubuntu/ saucy/main amd64 Packages
100 /var/lib/dpkg/status
2.51-zfs1 0
1001 http://ppa.launchpad.net/zfs-native/stable/ubuntu/ saucy/main amd64 Packages
Rebooting was all I needed from this point on and all was finally upgraded and fully functional.